The Azure Virtual Machine service is one of the most concrete examples of how resource creation in the cloud can be reduced to seconds. With approximately 15 clicks, we can create virtual machines in the operating system and size we want and configure their network settings.
When creating a virtual machine, choosing the connected disk is also very important. Making an assessment according to the purpose of use while determining the disk type and size will be the healthiest method.
The disk type you choose must be one of the following;
- Premium SSD
- Standard SSD
- Standard HDD
HDD disks, providing low performance/high latency, can be used as a cost-effective solution for development and test environments. We can say Standard SSD is the best choice in terms of price/performance, it can be preferred for reasonable cost and good performance. If you say I want high performance/low latency, my application is in the production environment and very critical, then Premium SSD will be the best choice here.
After determining the most suitable disk for our purpose, we created and attached the disk while creating the virtual machine. But what if we want to create an instant copy of this disk and attach it to another virtual machine? This is where the Disk Snapshot service comes into play.
Azure Disk Snapshot is a service that allows us to create a copy with an instant image of our disk in an easy and fast way. Let’s examine the installation steps with a scenario.
Scenario: We are running our application on a virtual machine with a Windows operating system, but we realize that our application will perform better on a Linux-based operating system. In this case, since we cannot change the operating system within the already created virtual machine, we want to easily transfer all the data to a new Linux virtual machine that we will set up. Then, it is important to delete the Windows operating system virtual server and its connected resources to prevent extra costs. To achieve this scenario, we will take a snapshot of the disk attached to the virtual machine with the Windows operating system and create a new disk from it. Then, while creating the Linux-based virtual machine, we will attach this disk and delete the windows resources.
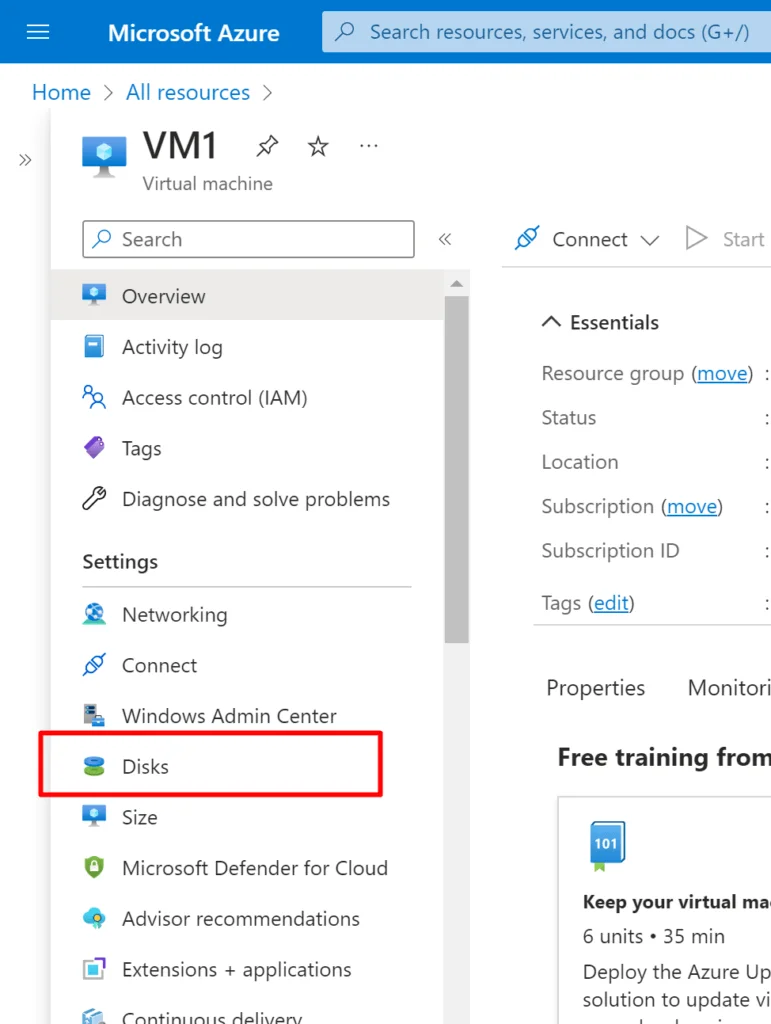
- We access the virtual machine to which the disk we will take a snapshot of is connected via portal.azure.com. We click on the Disks area from the bar on the left.
- We select and click our relevant disk from the Data disks area.
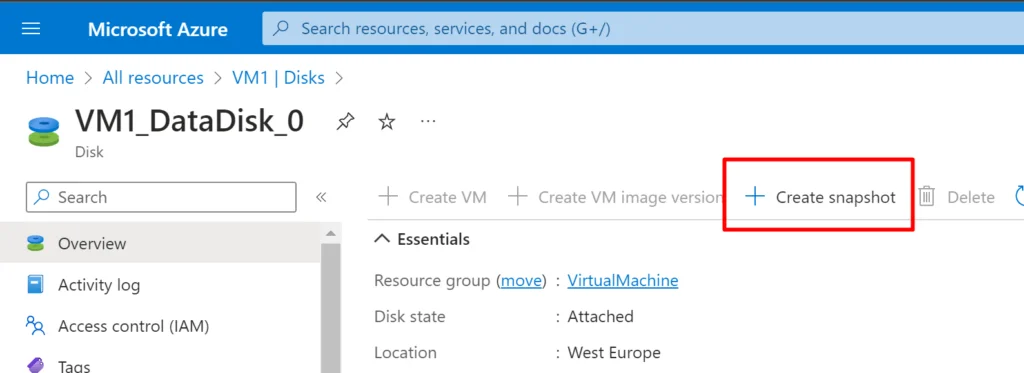
- We click on Create Snapshot.

- We fill in the Subscription and resource group fields and give our instance a name.
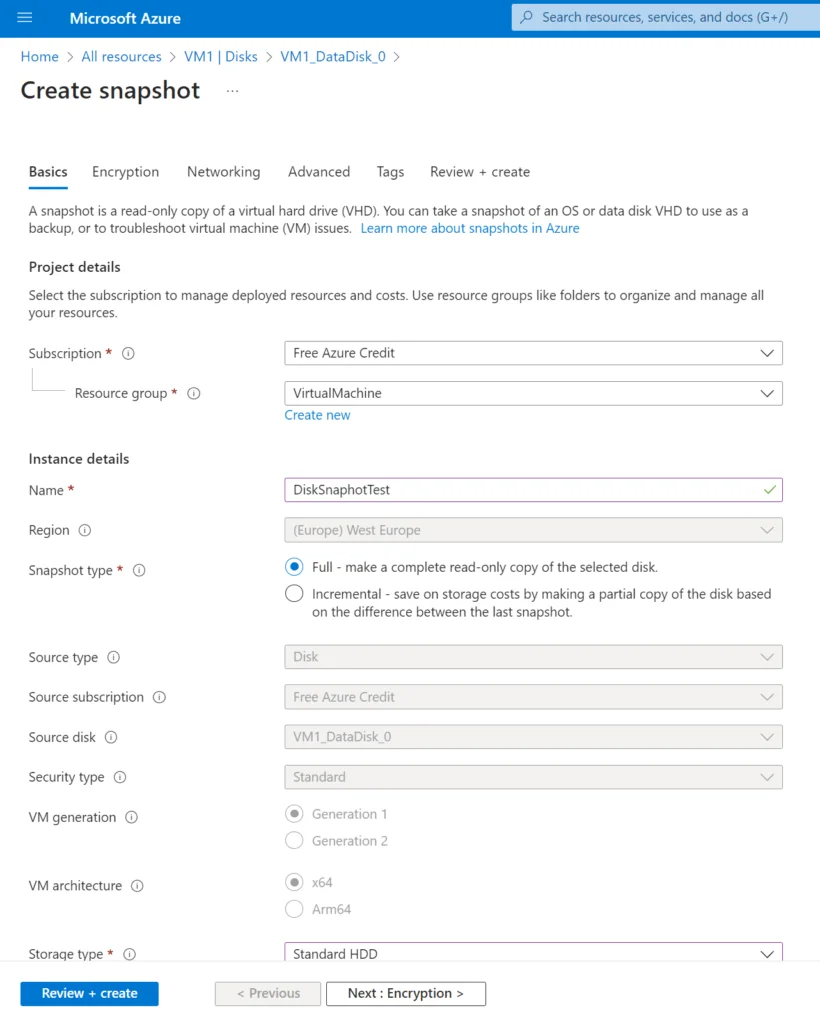
- If we have any extra customization in the remaining fields, we do it and then quickly create it. Once the deployment is complete, we go to our resource to check and our snapshot is ready. If there are no issues, we continue by clicking Create Disk. This way, we create a new disk from the snapshot we took.
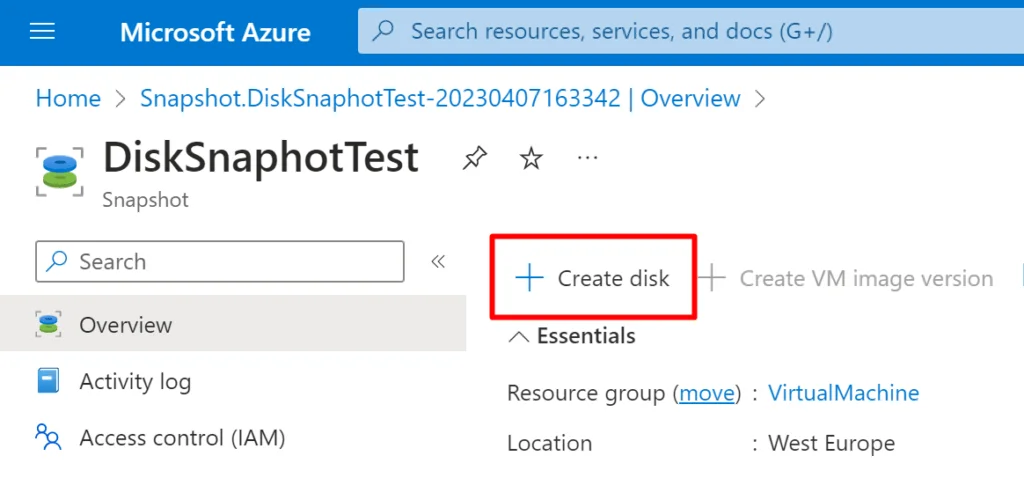
- We give our disk a name, proceed, and if we have any extra customization in the remaining fields, we do it and then create it.
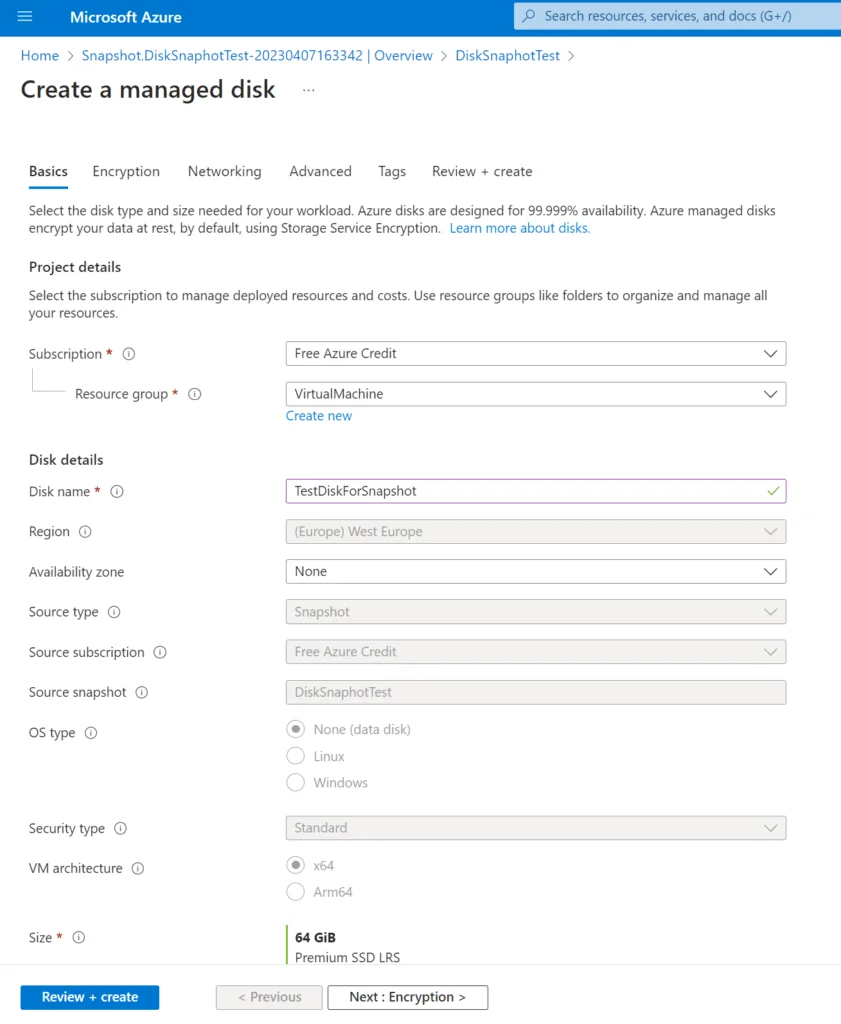
- After the process is completed, we now have a new disk from the snapshot but it is not attached to any vm. When we create our virtual machine hosting the Linux operating system, we attach this disk by clicking on the Attach an existing disk option when we come to the Disks area and then create our virtual machine.
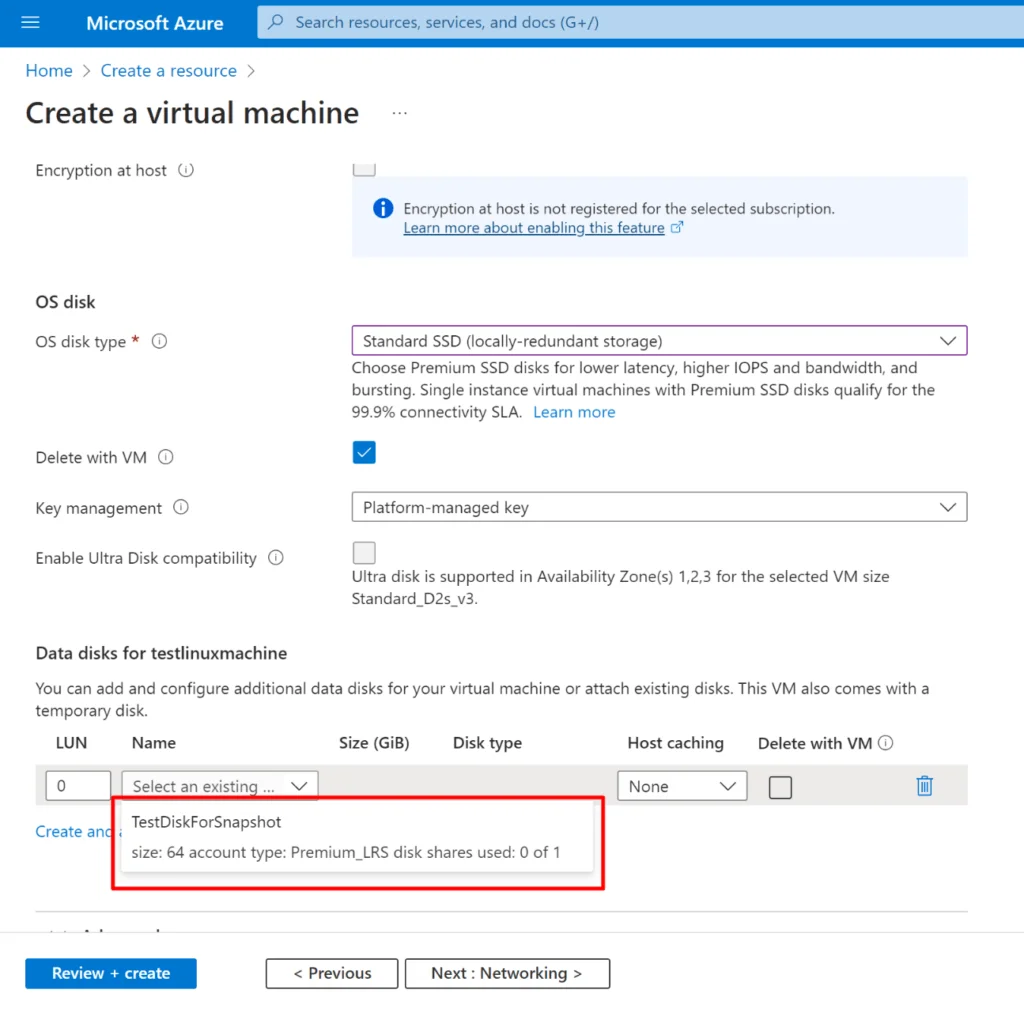
As a result of all these processes, we continue our life in our virtual machine with the Linux operating system without data loss.
Note: It’s important not to forget to mount the data drive after attaching the disk.
I wish you enjoyable and healthy days.


